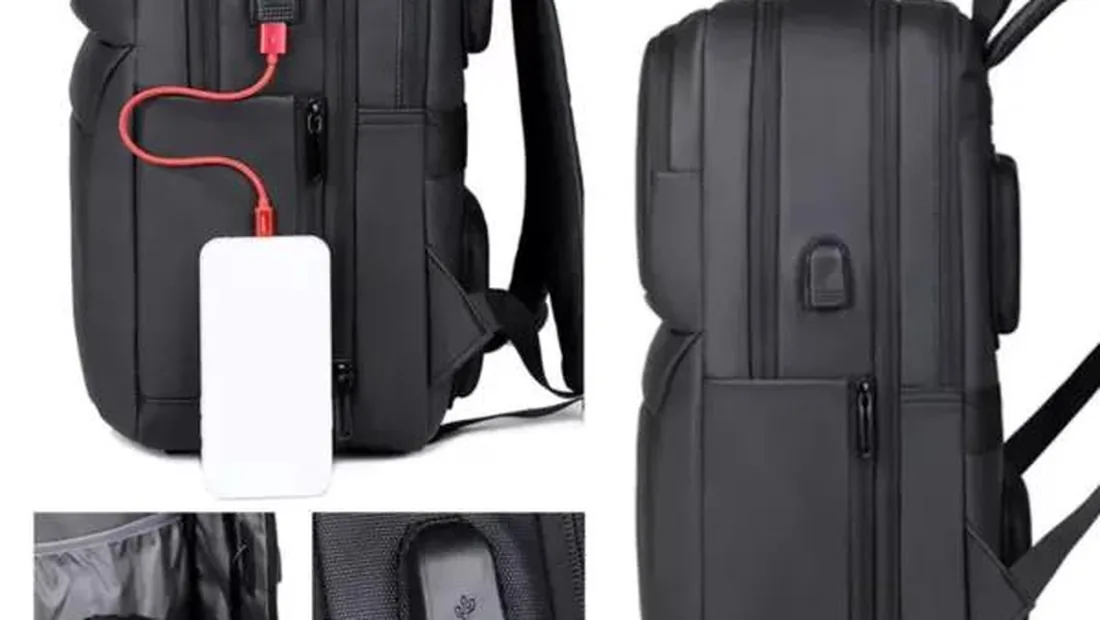
Parts of a backpack are not just names on a drawing. They are decisions. A buyer who specifies each component correctly gets a pack that survives testing, fits the intended user, and costs what the quote says. A buyer who skips this work gets a sample that looks right and fails in week three.
This guide walks the whole bag, from the main compartment to the smallest tri-glide. It is written for product developers and sourcing managers who need to write a spec sheet, not for hikers choosing a personal pack. For each part you get three things: what it does, where it fails, and what your tech pack must state.
Main Compartment, Lid, and Panels
The main compartment is the largest storage volume. It is defined by the front panel, back panel, side gussets, and bottom panel. Most backpacks use a U-shaped opening at the top or a clamshell opening that runs down the front. The opening style changes how the pack is loaded and how the zipper is stressed.
Where it fails: the main zipper is the most common warranty issue on a backpack. The second is the seam where the bottom panel meets the side gusset. Buyers often spec a heavy fabric for the front panel and forget that the bottom panel takes abrasion every time the pack is set down.
The lid is a flap that covers the main opening. On hiking packs it is often a separate floating lid with its own pocket. On school and commuter packs it is usually a simple flap with a buckle or hook-and-loop closure. A lid without a stiffener curls over time. A lid with a stiffener adds cost but keeps its shape through two years of daily use.
The front panel is where most branding goes. It also carries the front pocket, daisy chains, and sometimes a bungee system. The side panels carry water bottle pockets, compression straps, and attachment points. Your tech pack must state the panel fabric, the coating, the seam type, and the stitch density for every panel. Not just the front one.
The bottom panel deserves its own line in the spec sheet. It should state whether the panel uses a double layer, a coated fabric, a board insert, or a molded base. If the pack has a rain cover pocket in the bottom, that changes the seam structure completely.
Back Panel and Carrying System
The back panel is the surface that contacts the wearer's back. It is not just padding. It is a structure that controls ventilation, load transfer, and shape retention. A frameless pack uses the back panel and body fabric for shape. A frame sheet pack adds a semi-rigid sheet inside the back panel. Internal stays are narrow rigid elements that support vertical load transfer.
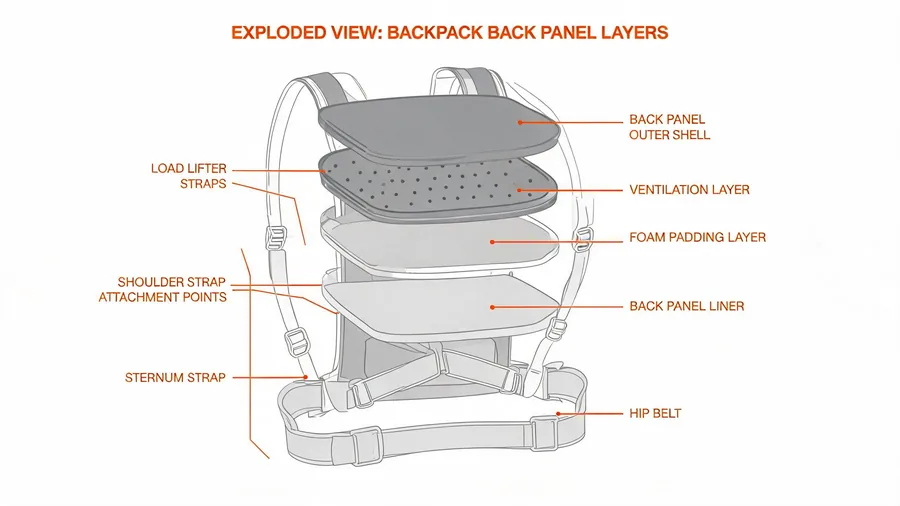
Foam channels are the grooves cut or molded into the back panel foam. They create air paths and reduce sweat buildup. They also reduce foam weight. The tradeoff is stability. Deeper channels mean more ventilation but less contact area. Your spec sheet must state the foam type, foam thickness, channel depth, channel pattern, and the mesh facing fabric.
Where it fails: the mesh facing wears through first. Then the foam compresses and the pack loses its shape. Then the user feels the contents through the back panel. This is a materials failure, not a design failure, and it is almost always caused by under-speccing the mesh denier or the foam density.
The lumbar pad is a separate padded area at the lower back. It improves contact and comfort on packs with a hip belt. On small daypacks it is often omitted. On technical packs it is structural. If your pack has a hip belt, the lumbar pad and the hip belt must be designed together. A hip belt stitched to a flat back panel without a lumbar pad transfers load poorly and digs into the hips.
Shoulder Straps
A shoulder strap is a system, not a single component. It has a webbing anchor, a foam core, a mesh or fabric facing, and an attachment point at the top and bottom of the pack. The upper anchor is usually a reinforced box-X stitch. The lower anchor is often a webbing ladder lock that allows length adjustment.
The strap curve matters. A strap that runs straight down from the shoulder creates neck pressure. A strap with an S-curve follows the body and spreads the load. The curve is cut into the foam, not sewn in. Your tech pack must include a strap pattern drawing with the curve, the foam thickness, the webbing width, and the anchor construction.
Where it fails: the foam collapses first, then the mesh wears at the shoulder contact point, then the anchor stitching fails. The lower anchor fails more often than the upper one because it takes more pull force when the pack is lifted by one strap. Spec a reinforced lower anchor and test it by lifting the loaded pack by one strap.
For a deeper look at strap construction, see our backpack straps guide.
Sternum Strap, Hip Belt, and Load Lifters
The sternum strap is a cross-chest strap that connects the two shoulder straps. It reduces outward strap movement and keeps the straps in place during active movement. It is usually adjustable in length and sometimes in height. The height adjustment is a webbing rail or a series of attachment loops. The buckle is a small side-release buckle.
The hip belt stabilizes the pack and can transfer part of the load toward the pelvis. On packs under 20 liters it is often a simple webbing belt. On packs over 30 liters it should be a padded belt with a buckle and possibly pockets. The hip belt works with the frame system. Without a frame sheet or stays, a padded hip belt is mostly cosmetic.
Load lifters are small straps at the top of the shoulder straps. They change the angle between the shoulder strap and the upper bag body. Pulling them brings the top of the pack closer to the body and shifts weight forward. They only work on packs with a frame or a stiff back panel. On a soft pack they just pull the fabric.
Where these fail: sternum strap buckles break when users over-tighten them. Hip belt webbing frays at the buckle. Load lifter anchors tear out of the back panel when the pack is heavy and the user pulls hard. All three need reinforced anchors and tested hardware.
Compression, Handles, and Attachment Points
Compression straps are external straps used to reduce pack volume, limit load shift, or secure an item. They run across the side panels or the front panel. They use a ladder lock or a side-release buckle for adjustment. The strap anchor points need bar tacks or box-X reinforcement because they receive repeated peak loads.
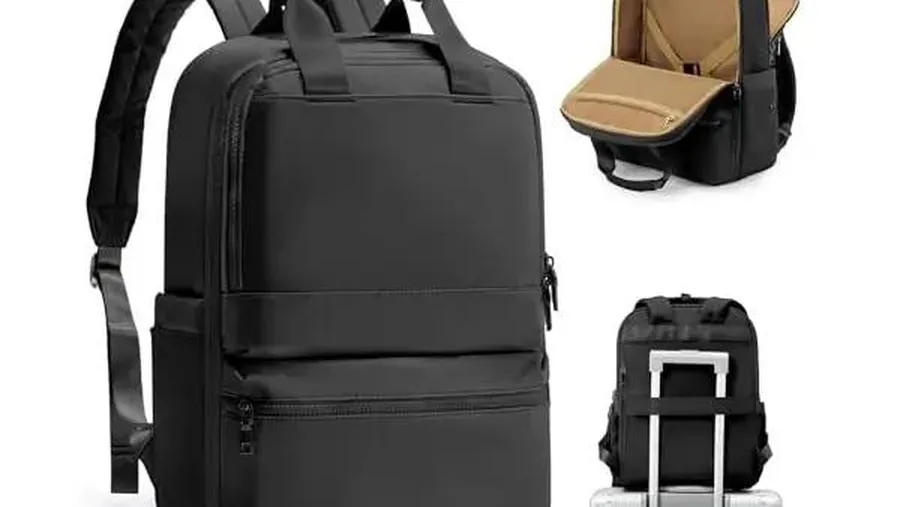
The grab handle is the short loop at the top of the pack. It is used for lifting the pack when it is not on the body. It is usually made from folded webbing or a padded fabric tube. The haul loop is a smaller loop, often at the top or back, used for hanging the pack or dragging it short distances. Both are simple parts that fail embarrassingly often because buyers spec the webbing width but not the stitch pattern.
D-rings are attachment points for accessories. Swivel hooks are used on detachable straps. Cord locks hold drawcords at an adjusted position. Tri-glides are three-slot webbing adjusters. Ladder locks change strap length and hold position under tension. Each of these has a size, a material, and a finish. Your bill of materials must list them individually. "Hardware: plastic, black" is not a spec.
Where they fail: plastic hardware gets brittle in cold weather. Metal hardware corrodes in salt air. Cord locks pop open when the spring loses tension. D-rings pull out of their webbing loops when the loop is not bar-tacked. Specify the hardware material, the finish, the working temperature range if relevant, and the attachment method.
Zippers, Closures, and Edge Finishes
The zipper chain is the interlocking teeth or coils attached to textile tapes. The slider joins or separates the chain. The puller is the tab attached to the slider. These are three separate components with three separate specs. The chain has a tape width and a tooth size. The slider has a size and a finish. The puller has a shape, a material, and often a logo.
Where zippers fail: the slider wears before the chain. The tape frays at the ends. The puller snaps off when users yank it. The zipper on the main compartment fails more often than any other zipper on the pack because it is opened and closed the most and carries the most stress. Spec a larger chain size on the main opening than on the front pocket.
Piping is a corded edge detail inserted into a seam. It adds shape and protects the edge. Binding is a fabric tape sewn over a raw edge. Elastic binding is used around pockets and openings. Hook-and-loop fastener is used for flaps, dividers, and removable components. Each of these edge finishes has a width, a material, and a stitch count.
Where edge finishes fail: piping wears through at the corners. Binding frays at the ends. Elastic binding loses stretch after repeated use. Hook-and-loop fastener fills with lint and stops holding. These are wear items. They will fail eventually. The question is whether they fail after the warranty period or before it.
Reinforcement Stitches: Bar Tacks and Box-X
A bar tack is a dense zigzag stitch used to reinforce a stress point. A box-X is a rectangular stitch pattern with an X through the middle. Both are used at strap anchors, handle attachments, and webbing loops. They are not decorative. They are structural.
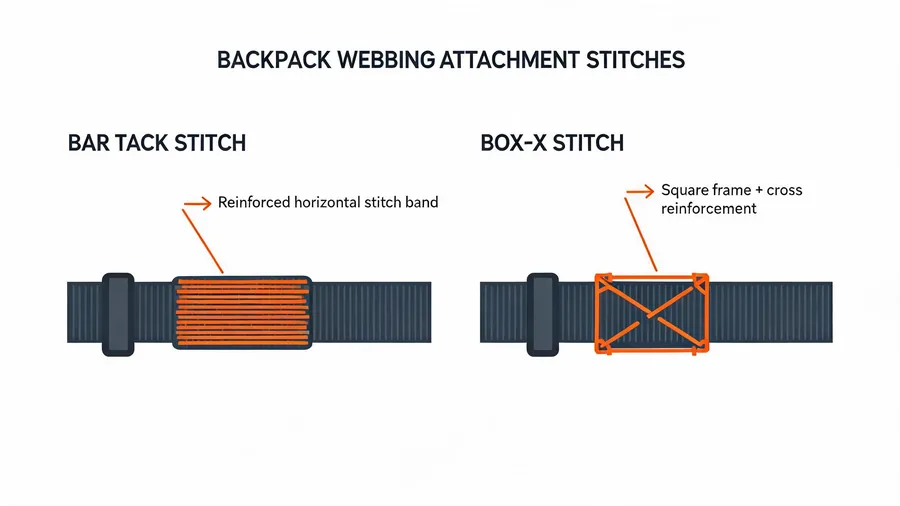
Where they fail: a bar tack that is too short or too narrow pulls out under load. A box-X that is not centered on the webbing tears the fabric. The stitch density matters as much as the pattern. Your spec sheet must state the stitch pattern, the stitch count, the thread type, and the thread color for every reinforcement point. Not just "reinforced."
One common mistake: a buyer specs a box-X on the shoulder strap anchor but forgets the bar tack on the webbing loop that holds the D-ring. The D-ring loop fails first. Then the whole attachment point fails. Walk every attachment point on the pack and list the reinforcement for each one.
Spec Sheet Requirements by Component
This table maps each component to the minimum detail a tech pack must carry. It is a starting point. Complex packs need more.
| Component | Spec Sheet Must State |
|---|---|
| Main compartment | Opening style, volume, lining fabric, seam type, stitch density |
| Bottom panel | Fabric, coating, reinforcement layer, seam construction |
| Back panel | Foam type, foam thickness, channel pattern, mesh facing, frame type |
| Shoulder strap | Pattern curve, foam thickness, webbing width, anchor construction |
| Sternum strap | Webbing width, buckle size, height adjustment method |
| Hip belt | Padding thickness, webbing width, buckle type, attachment method |
| Load lifter | Webbing width, anchor reinforcement, adjustment range |
| Compression strap | Webbing width, hardware type, anchor reinforcement |
| Grab handle | Webbing width, stitch pattern, padding material |
| Zipper chain | Chain size, tape width, material, finish |
| Slider | Size, material, finish, locking or non-locking |
| Puller | Shape, material, finish, logo placement |
| Buckle | Size, material, breaking strength, finish |
| Ladder lock | Webbing width compatibility, material, finish |
| Tri-glide | Slot width, material, finish |
| Cord lock | Cord diameter compatibility, spring type, material |
| D-ring | Inner diameter, material, finish, attachment loop construction |
| Webbing | Width, material, weave, breaking strength, color |
| Piping | Diameter, cord material, outer fabric, stitch count |
| Binding | Width, material, stitch count, color |
| Bar tack | Length, width, stitch count, thread type |
| Box-X | Dimensions, stitch count, thread type, placement |
This level of detail feels like overkill on a simple daypack. It is not. The difference between a pack that survives a season and a pack that survives a warranty period is in these lines. When a factory asks for a complete bill of materials, this is what they mean.
For capacity and fit guidance, read our backpack size and capacity guide. If you are evaluating suppliers, see our list of backpack manufacturers in China. And if you want to understand how we build packs from your spec, the OEM process page walks through it step by step.
Frequently Asked Questions
What is the difference between a frame sheet and internal stays?
A frame sheet is a semi-rigid sheet inside the back panel that limits collapse and spreads pressure across a wide area. Internal stays are narrow rigid elements that support vertical load transfer. A pack can use one, both, or neither. The choice depends on the intended load and the pack volume.
Which part of a backpack fails first in daily use?
The main zipper slider and the mesh facing on the back panel are the two most common early failures. The lower shoulder strap anchor also fails often because it takes high pull force when the pack is lifted by one strap. Spec these three areas carefully.
How many reinforcement stitches does a strap anchor need?
A bar tack or a box-X is the minimum. The exact stitch count and thread type depend on the fabric, the webbing, and the intended load. The spec sheet must state the pattern, the dimensions, the stitch count, and the thread for every anchor point.
Do I need a hip belt on a 20-liter backpack?
Not necessarily. On packs under 20 liters a simple webbing belt is common and mostly for stabilization. A padded hip belt only transfers load effectively when the pack has a frame sheet or internal stays. Without a frame, a padded hip belt is mostly cosmetic.