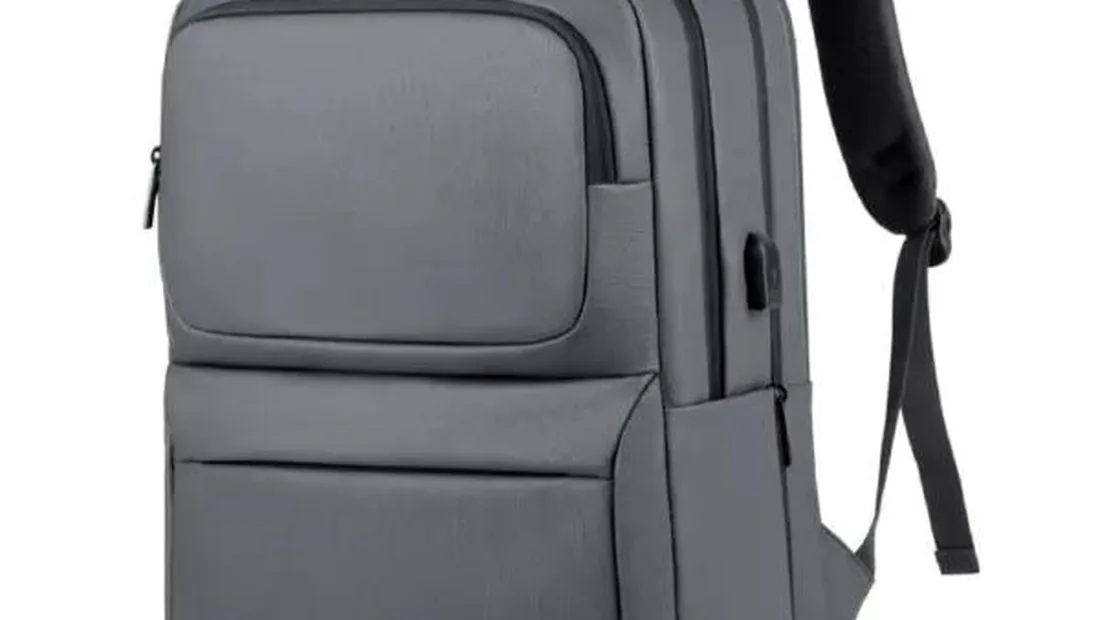
An embroidered backpack carries a logo that is stitched into the material, not printed on top of it. The design becomes a durable, raised surface. Buyers evaluating custom embroidered backpacks usually ask three questions first. Which panels can be embroidered? What drives the cost? And which fabrics will actually hold the stitches? The answers decide whether the order looks premium or cheap.
Embroidery is not one process. It's a sequence that starts with artwork and ends with a finished panel sewn into the bag. Get one step wrong and the logo puckers. The needle cuts the fabric. Or the production line slows to a crawl. This guide walks through the full chain for sourcing managers and brand owners.
How embroidery is applied to a backpack
Embroidery is stitched into the material to create a durable raised design. The machine drives thread through the face fabric in a programmed pattern. What the buyer sees is the result of thousands of needle penetrations. Each one is locked into place by a backing layer underneath.
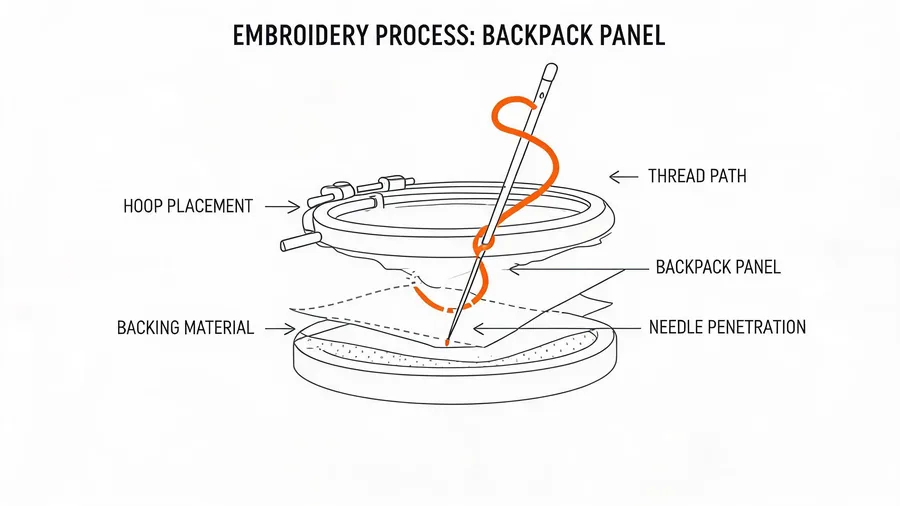
Panel embroidery is done before assembly so the panel can lie flat under the needle. A finished backpack will not fit under an embroidery head cleanly. The straps, zippers, foam and lining get in the way. So the factory hoops the cut panel, runs the embroidery, then sends that panel to the sewing line.
Backing, needle selection, stitch density and panel distortion require control. The backing is a stabiliser placed behind the face fabric. It stops the fabric from stretching and bunching while the needle works. Needle choice depends on the fabric weight and coating. Stitch density determines how solid the logo looks. Panel distortion is what happens when dense stitching pulls a lightweight fabric out of shape.
Finished or semi-finished panel embroidery is the standard approach for backpacks. A semi-finished panel might have its edges folded or a zipper attached, but it still lies flat enough to hoop. A fully assembled bag is only embroidered when the design is small, the location is accessible, and the buyer accepts the risk of distortion.
This is why lead time for an embroidered order includes a step most buyers do not see. The panel is cut, hooped, stitched, inspected, and only then assembled. If the embroidery fails inspection, the panel is scrapped before it becomes a finished bag. That is cheaper than scrapping a completed backpack.
Which backpack panels can be embroidered
Front pocket flap, top lid and shoulder strap are common embroidery locations. These panels are usually flat, accessible, and cut before assembly. A small logo on the front pocket flap is the most requested position. The top lid works well for larger designs because it has more surface area.
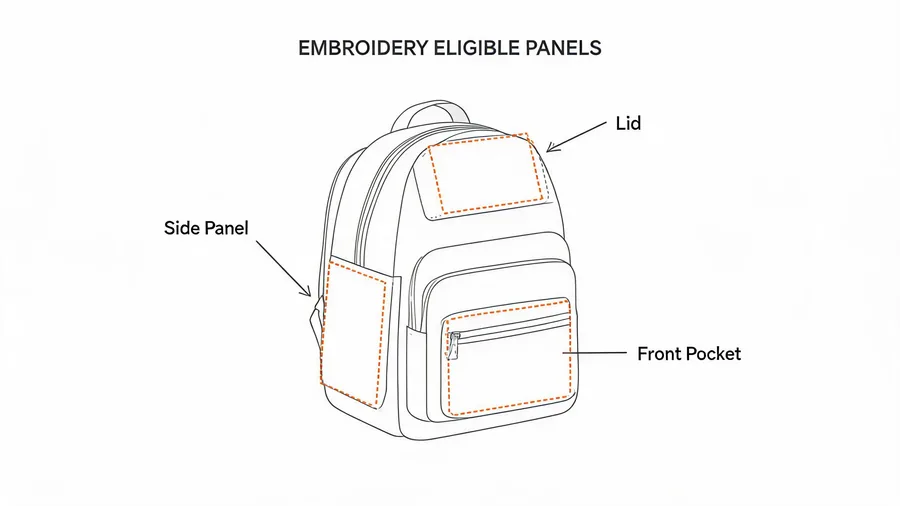
Shoulder strap embroidery is possible but trickier. The strap is narrow and made of multiple layers: webbing, foam, mesh facing. Dense stitching through that stack can crush the foam and make the strap stiff. Buyers who want strap embroidery should specify a lower stitch density and a thinner logo.
Panels that are already assembled or have foam or board behind them are harder to hoop. A back panel with a frame sheet inside will not lie flat. A base panel with a plastic board cannot be hooped without bending the board. The embroidery machine needs a flat, flexible surface. If the panel cannot be hooped, it cannot be embroidered.
Laminated or heavily coated panels may pucker or show needle holes. Every needle penetration creates a hole. On a dense woven fabric, the yarns close back around the thread. On a coated fabric, the hole stays visible. PU-coated nylon and TPU-laminated panels are the worst offenders.
Placement limits should be described qualitatively unless the spec sheet gives millimetres. A buyer ordering 800 units in three colors should not rely on a verbal description. The spec sheet must carry artwork dimensions, placement coordinates and a tolerance. Without that, the factory guesses and the buyer rejects.
Fabrics that embroider cleanly versus fabrics that pucker
Dense woven fabrics such as canvas and high-denier polyester hold stitches well. The yarns are packed tightly enough to grip the thread. A 600D polyester panel or a 12 oz canvas panel will take a dense logo without distortion. These are the safe choices for embroidery.
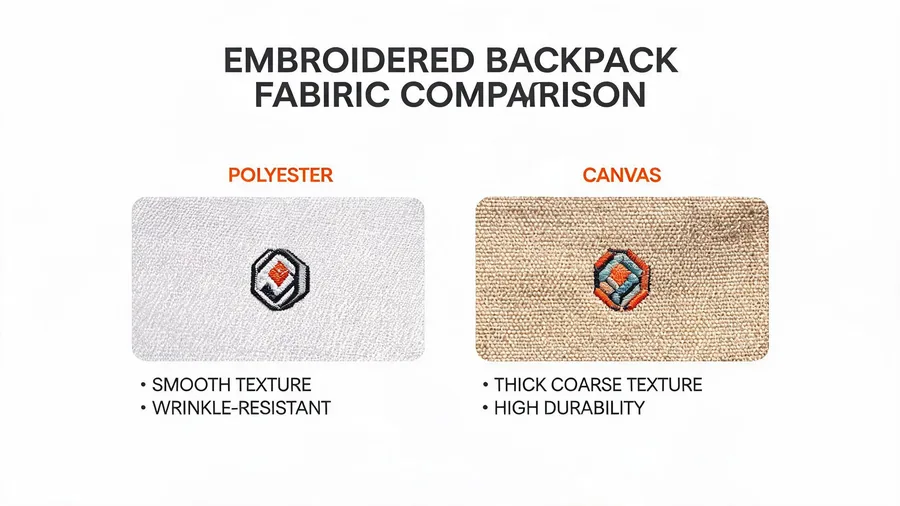
Thin nylon and laminated fabrics can pucker or distort under dense stitching. A 110 gsm nylon panel has little structure. The needle pushes the yarns apart and the thread pulls them together. The result is a wrinkled ring around the logo. A PU coating makes it worse because the coating cracks around each needle hole.
A backing or stabiliser supports the face fabric during stitching. It is placed under the panel inside the hoop. For lightweight fabrics, a heavier stabiliser compensates for the lack of body. For coated fabrics, the stabiliser does not fix the visible needle holes. It only controls the distortion during stitching.
Material specification terms like denier, GSM and coating weight affect embroidery quality. Denier describes the yarn, GSM the fabric mass per area, and coating weight the amount of polymer on the surface. A buyer who specifies only "nylon" has not told the factory enough. The embroidery result depends on all three.
Digitising and stitch count as the cost driver
Artwork must be converted into a stitch file before embroidery. The logo file a brand sends is not what the machine reads. A digitizer maps the artwork into a sequence of stitches: where the needle enters, where it exits, how the thread travels, and when it trims. This file is specific to the fabric and the panel.
Stitch count is the main cost driver for embroidery. Every stitch takes machine time. A logo with 5,000 stitches costs more than one with 2,000. A dense fill area adds stitches fast. A simple outline adds few. The stitch count is calculated during digitising and quoted before production.
Thread colors, stitch density and design detail all affect stitch count. A three-color logo needs thread changes, which slow the machine. A high stitch density makes the logo solid but adds stitches. Fine detail like small text requires more stitches per letter to stay legible.
Woven labels are a lower-detail alternative for small text. A woven label is a textile label in which the design is created by interlacing yarns. Tiny text that would turn into a blob in embroidery can be crisp on a woven label. The label is then sewn onto the panel. This is why many brands put small care instructions or legal text on a label instead of embroidering it.
Embroidery vs screen print, heat transfer and woven label
Each decoration method has a different cost driver and a different failure mode. Embroidery is durable and raised but limited in fine detail. Screen printing suits solid colors and repeat production. Heat-transfer graphics require adhesion, stretch, wash and abrasion validation. Woven labels excel at small text.
The table below compares the four methods for backpack decoration.
| Method | Durability | Detail limit | Cost driver | Typical use |
|---|---|---|---|---|
| Embroidery | High, raised surface | Fine text and gradients are hard | Stitch count and thread changes | Logos on front pocket flap, top lid |
| Screen printing | Good on solid colors | Solid areas, limited color count | Screen setup and color count | Large graphics on flat panels |
| Heat transfer | Depends on adhesion and wash testing | Detailed graphics, photos | Transfer production and validation | Complex artwork, short runs |
| Woven label | High, flexible | Very small text works | Label weaving and sewing | Care labels, small brand marks |
Embroidery wins when the logo must survive years of use and look premium. Screen printing wins when the design is large and flat. Heat transfer wins when the artwork is too detailed for stitching. Woven label wins when the text is too small to embroider.
Minimum order quantities differ too. Embroidery is usually available at the same MOQ as the backpack itself. Screen printing may have a lower setup cost for repeat orders. Heat transfer often has no minimum beyond the transfer sheet. The buyer should ask the supplier for the specific structure, not assume one rule fits all.
What a spec sheet must carry for an embroidered order
A spec sheet is not a nice-to-have. It is the document that prevents a 500-piece order from arriving with the logo in the wrong place. The following items must be written down before production starts.
Artwork dimensions, placement coordinates, process, colors and durability requirements. The dimensions state how large the logo is. The coordinates state where it sits on the panel. The process states embroidery, not screen print. The colors state the thread references. The durability requirements state how the logo must survive washing, rubbing and flexing.
Thread type, stitch density and backing specification. Thread type matters for colorfastness and abrasion. Stitch density controls how solid the logo looks and how much the panel distorts. Backing specification states the stabiliser type and whether it is removed or left in place.
Panel map and material composition. The panel map shows which panel is embroidered and where it sits in the finished bag. The material composition states the face fabric, coating, and any lamination. A spec sheet that says "embroider logo on front" is not a spec sheet. It is a wish.
Label content, care instructions and traceability code. Every decorated backpack needs a label. The label carries care instructions, composition, origin and a traceability code. This is separate from the embroidery. The traceability code lets the buyer track the batch if a quality issue appears later.
We operate 50+ automated production lines in our BSCI-certified factory. Our factory holds amfori BSCI, ISO 9001, SGS, TUV and GRS certifications. When you send a spec sheet, our team checks it against the panel map and the embroidery file before cutting anything. Contact us by email at [email protected].
One more thing. The backpack strap guide covers what happens when a strap carries load, which matters if you embroider on a strap. The size and capacity guide explains how panel dimensions affect the finished bag. And if you are still choosing the base bag, the school backpack range and travel backpack range show what panel layouts work best for embroidery.
Frequently Asked Questions
What is the minimum order quantity for custom embroidered backpacks?
The MOQ for embroidery is usually the same as the MOQ for the backpack itself. On our standard backpack ranges that starts at 500 pieces. Special fabrics or complex structures can raise it to 1,000 pieces. Ask the supplier for the specific structure, because embroidery setup is a separate cost from the bag MOQ.
How long does it take to produce custom embroidered backpacks?
Backpack mass production runs 15 to 20 days for standard orders. Complex structures or orders over 10,000 pieces run 25 to 30 days. Embroidery adds digitising time before production and stitching time on the line. The digitising step is usually 1 to 3 days depending on the artwork.
Which fabrics work best for embroidered backpack logos?
Dense woven fabrics hold stitches best. Canvas and high-denier polyester like 600D are safe choices. Thin nylon and laminated or heavily coated fabrics pucker and show needle holes. A stabiliser backing helps with lightweight fabrics but does not fix the visible holes on coated panels.
What is the difference between embroidered and screen-printed backpack logos?
Embroidery stitches the design into the fabric, creating a raised, durable surface. Screen printing forces ink through a screen onto the material, which works better for large solid graphics. Embroidery is limited in fine detail and is driven by stitch count. Screen printing is driven by screen setup and color count.